The Canon EF 35mm F2 lenses are an essential part of any Canon photographer's kit. On a crop lens like APS-C, 35mm works more or less as a "normal" lens. On full frame it's a very versatile wide-ish angle field of view.
There are two common problems people encounter with the EF 35mm F2:
- Sticky or gummy rubberized surface on the focus ring.
- Stuck or glitchy autofocus caused by a variety of issues, but mostly deformation in the barrel track for the focus guides.
This tutorial provides a simple DIY solution for fixing the gummy focus ring problem.
It's rather simple to remove the focus ring, clean it thoroughly, and replace on the lens body. The focus ring is accessbile from the front of the lens and requires removing only one screw.
The autofocus repair is more involved and requires disassembling the rear of the lens. There are plenty of tutorials on YouTube that walk through that process.
Please follow the rest of this tutorial at your own risk. These are valuable lenses. If you don't know what you're doing, consult a qualified repair shop.
Get your tools together in a clean, well-lighted work area. You'll need:
- Precision flathead screwdriver, either 0.9 or 1.2mm.
- Clear alcohol, the higher percentage alcohol the better. I used pure grain spirits.
- Small tub or dish big enough to hold the focus ring.
- Cotton swabs and a soft cleaning brush (an old toothbrush works well).
- Rags or paper towels.
You can find an exploded view of the lens with part numbers at http://f20c.com/stuff/canon/partslist/EF%2035%202.0.PDF.
Note that, in theory, you could simply replace the focus ring. If this process doesn't work on your lens, you may need to do so. The part is Canon CY1-2638-000 and is shared with both the EF 35mm F2 and EF 15mm F2.8 fish eye lenses. However, parts for cameras this old are no longer available from Canon and my experience was that third-party suppliers don't sell parts retail anymore. I was able to find a few CY1-2638-000 parts on Ebay at anywhere from $30 to $50 US.
Let's get started trying to clean it up before replacing. You can leave front and rear caps on the lens for safety throughout this procedure.
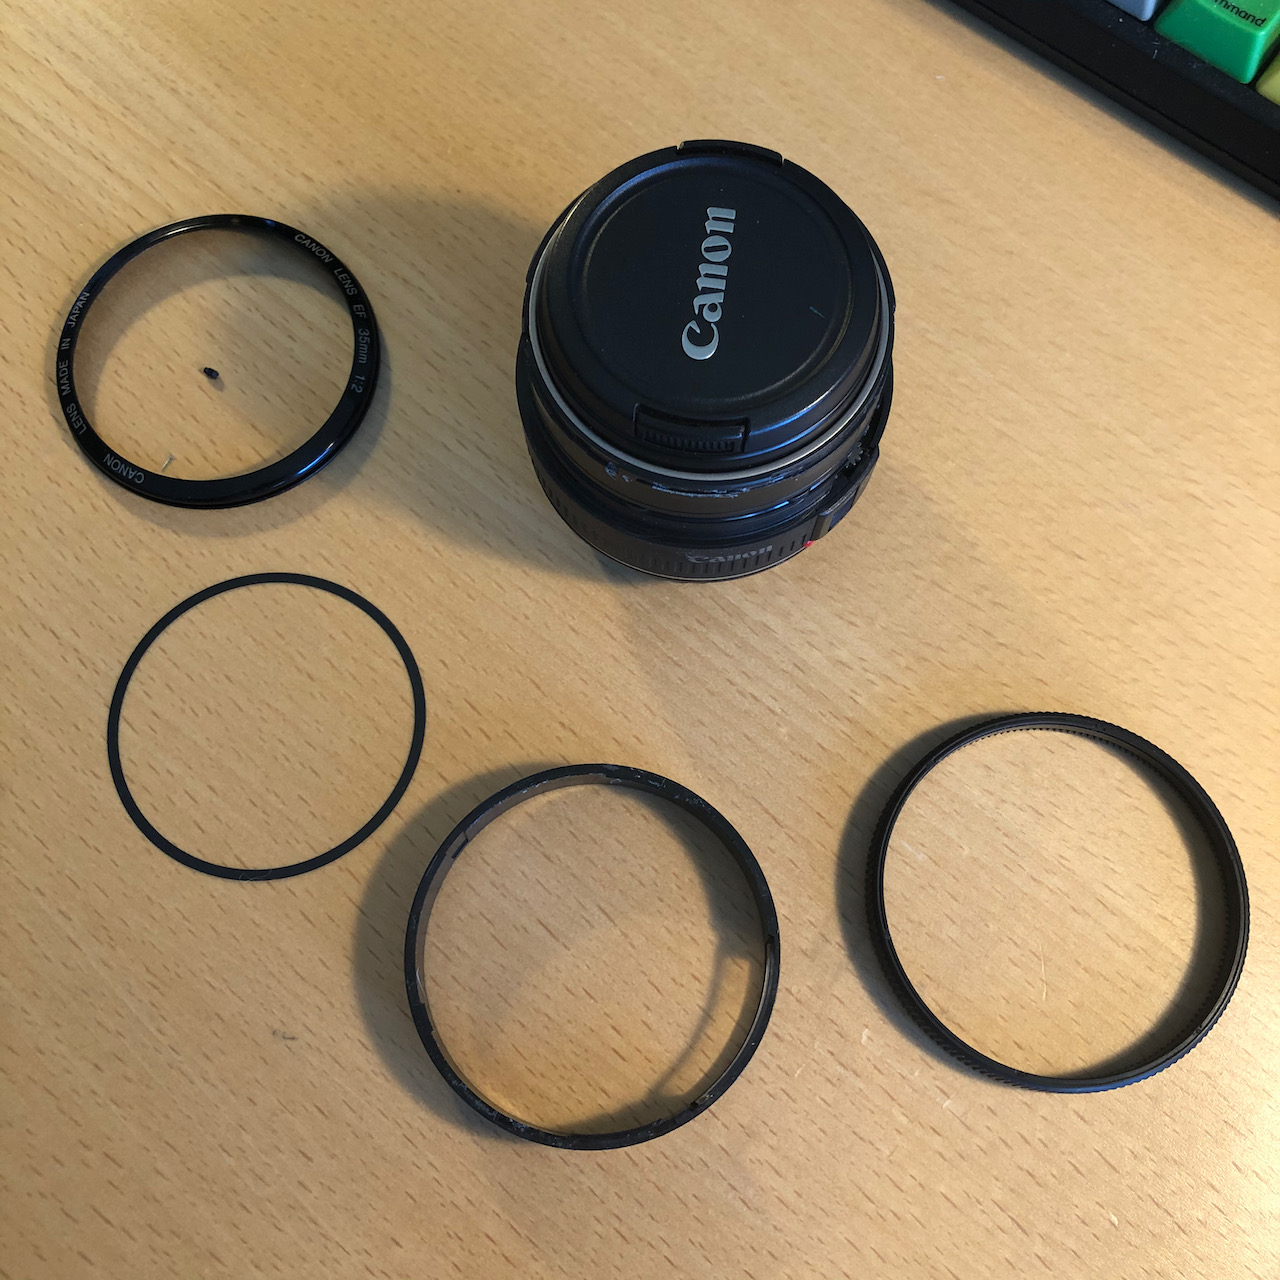
As you take parts off, lay them out in order so you can return them in the same order.
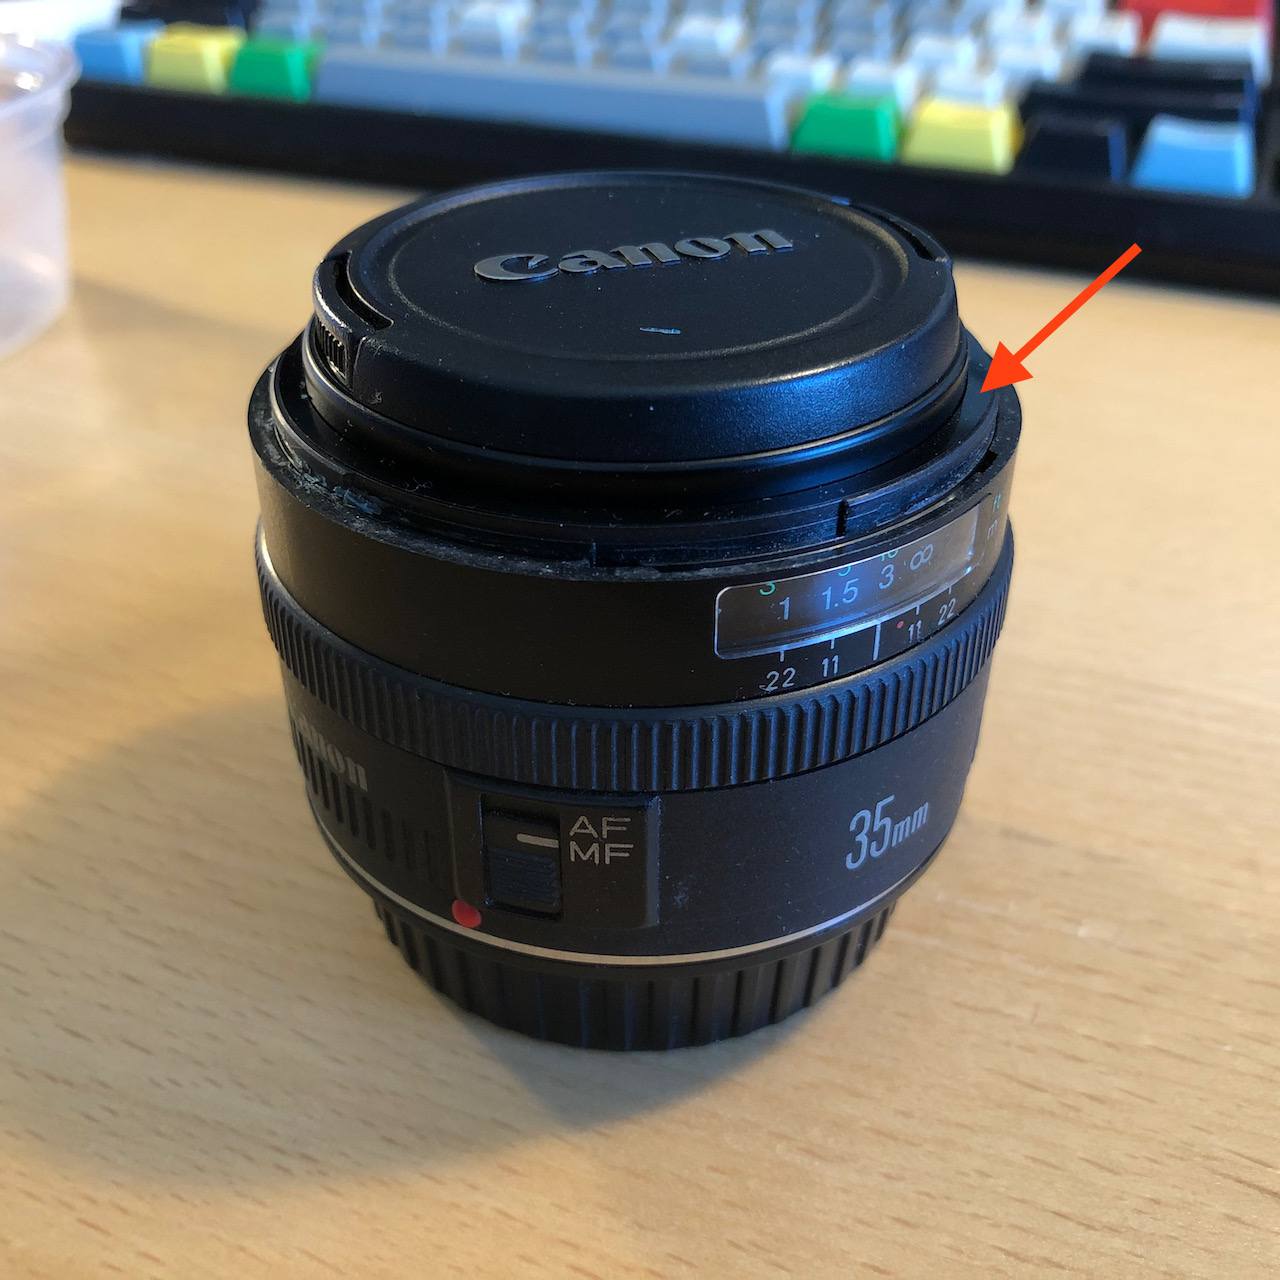
Locate and remove the set screw in the front name ring (YA2-0183-000). Put the small set screw in a safe place.

Turn the name ring counterclockwise to unlock, then remove.
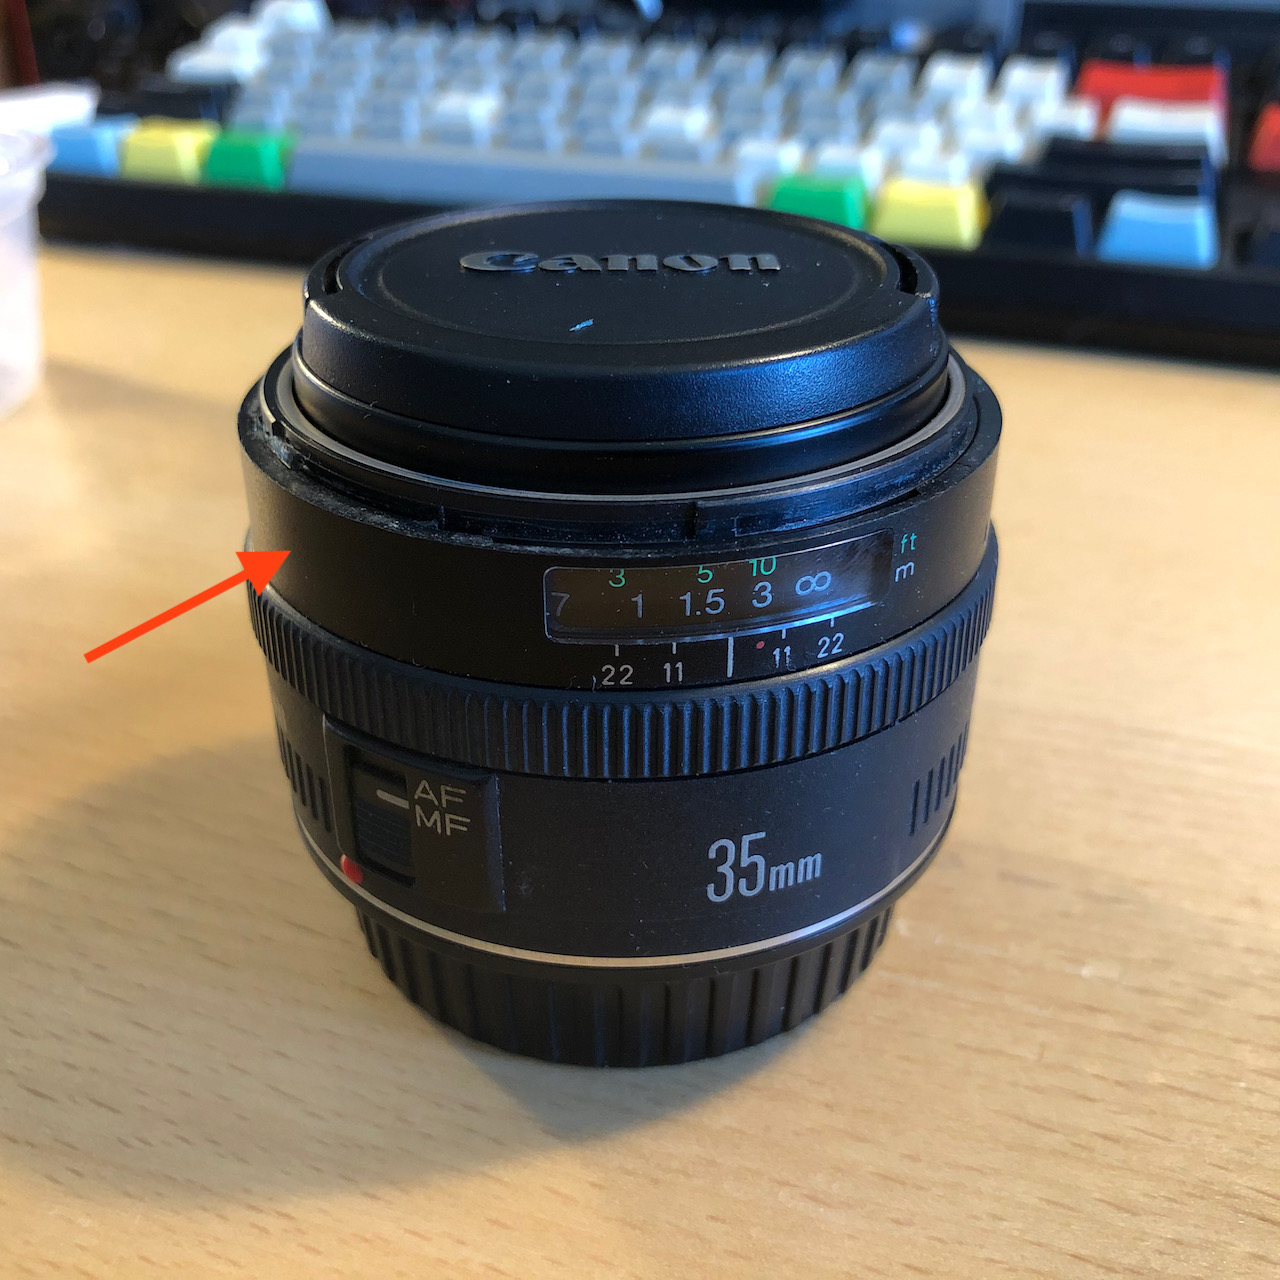
Remove the dark washer dust shield (CA2-4544-000) that sits below the name ring.
Remove the index ring (CG9-5318-000) -- the plastic ring with the window showing focus distance. Use gentle pressure. This part is indexed in place and held with a tiny amount of now brittle glue.
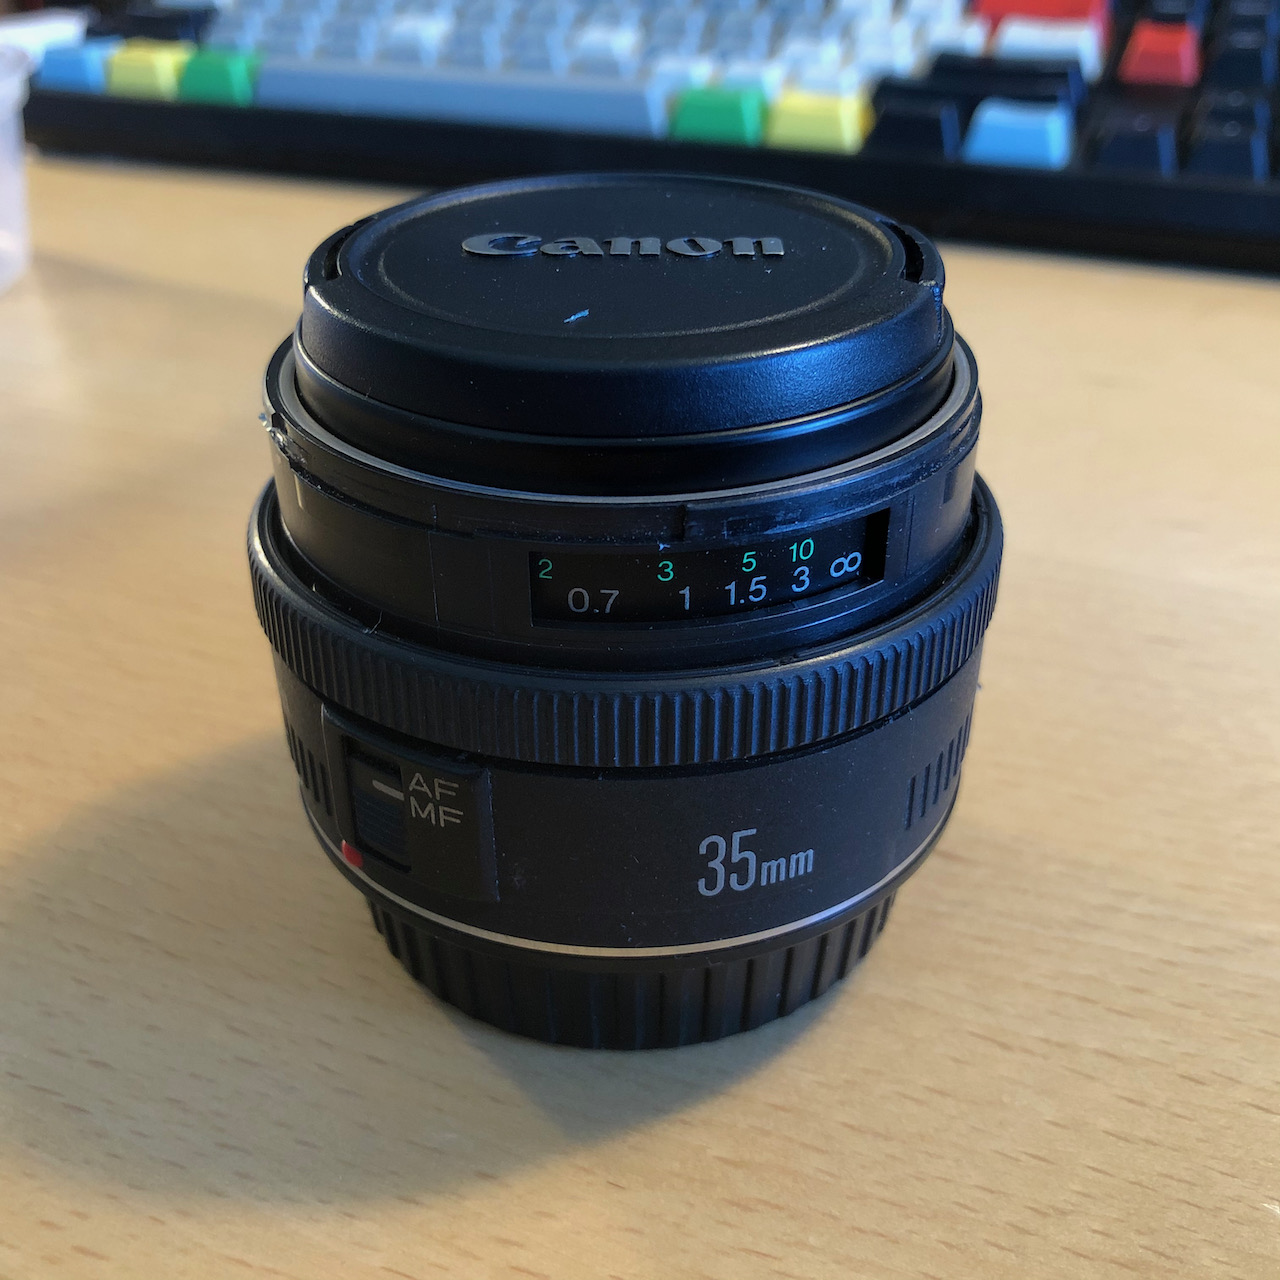
Now simply lift off the focus ring. Note that the toothed side of the ring engages with autofocus gears to the rear of the lens.
Here's all the parts layed out in the order in which they came off (left to right). You'll replace them in reverse order (right to left).
Drop the focus ring into the dish and pour in just enough alcohol to cover. You won't need much. Let it soak a few minutes. Then start scrubbing with the toothbrush. Scrub all the way around the outside, top, and bottom. Swabs may come in handy for the edges, the brush will remove any gummy gunk from between the ridges of the ring.

When cleaned up and no longer gummy or sticky, give a final rinse in the alcohol and dry off with a clean wipe or paper towel and allow to dry.
If this procedure doesn't remove the sticky surface of the focus ring, then you may need to explore alternatives such as a new part.
Assembly is the opposite of disassembly.