I don't know if other kids are like this, but our girls have demonstrated again and again that an empty box can provide as much engaging play time as the toys that may have come in it. And certainly more fun than the boring mommy and daddy stuff that arrives in the bigger boxes.
Of course, the bigger the box, the bigger the possibilities... which ultimately led to making these playhouses for the kids.
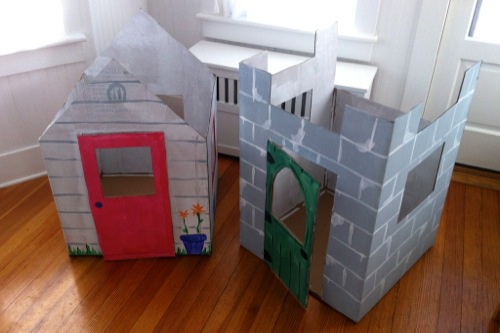
They were easy to build and I will explain how you can build some, too.
You will need:
-
A box. The bigger, the better.
-
A box cutter or something similar. I like my classic Stanley 199 utility knife. A fresh, sharp blade helps make clean, straight cuts.
-
Glue or tape. I use Gorilla wood glue, which just happens to be made in the USA.
-
A pencil, and maybe a ruler (though you can use a cut-off box end as a straightedge like I did).
-
Paint, if you want.
You could probably get fancier than this and, I don't know, make curtains or something. I will leave that to you and your therapist to work out.
Building the Playhouse
The steps to build the playhouse are straightforward.
First, secure the flaps on one end of the box. This will be the bottom of the playhouse. If you are starting with a used box, it may already be taped shut, which is fine. Gluing the flaps shut makes the entire structure more secure (which extends the life of the playhouse) and keeps them from flopping about.
If you glue the flaps, give them a few hours to dry. You can "clamp" the flaps together by turning the box bottom side down and placing something heavy like paint cans on them.
Now cut off all four flaps on the other end. This will be the top. I will come back to why I leave the top open in a minute.
If you want to add a roof profile of some sort, this is a good time to cut those bits out. Use your ruler or the edge of a cut-off flap as a straightedge. Learn from my mistakes: do not succumb to the urge to eyeball your cuts. As Norm cautions: "Measure twice, cut once." It doesn't need to be perfect, but stupid mistakes lead to frustration, which leads to making this not as much fun as it should be.
This is also a good time to plan for your door. Just cutting an open space is one easy option. One of the cut-off end flaps provides a handy template that is big enough for kids up to probably 5 years.
In previous playhouses I have just cut through the top, bottom, and one side of the door, then made a slight score on the other side of the door as a hinge. This is quick and easy, but the top corner of an unreinforced door tends to bend and collapse over time, particularly if you cut in a window.
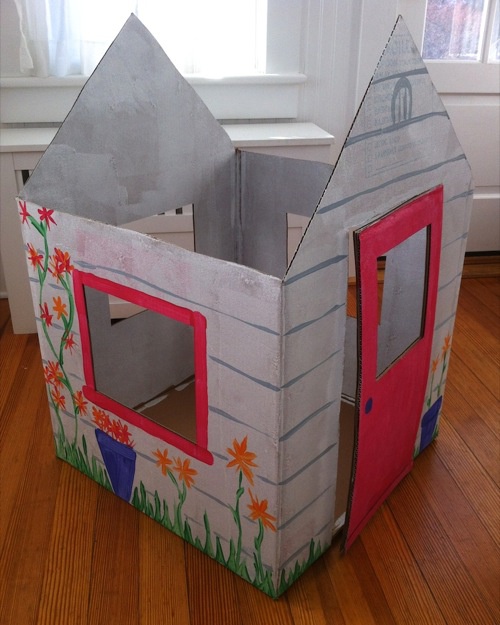
For this set of playhouses I glued one of the cut-off flaps onto the side of the box to create a much stronger double-layer door. When the glue dried, I cut a window, cut the three edges, then scored the remaining edge on the inside to create a hinge.
If you have problems with the door, do not despair. A little packing tape cures most problems. Worst case scenario: just cut out the door and go without.
Windows can be cut out either before or after painting. I like to carefully map out the first window, then use the cut-out piece as a template for the other windows. One on each side lets in plenty of air and light. Just be careful of cutting out so much that the box becomes weakened.
To Paint or Not to Paint?
That choice is really up to you. I did not paint our first few attempts and the kids were perfectly happy. Eventually they decorated the boxes themselves with crayons and tempera paints.
This time I had some leftover interior primer — the 5 gallon bucket seemed like such a good idea — and used it as a neutral base. A roller makes this go on fast. Do not apply the paint too thick, though, because the moisture may warp the cardboard. On the other hand, I think the dry paint gives the box a little added rigidity. Your mileage may vary.
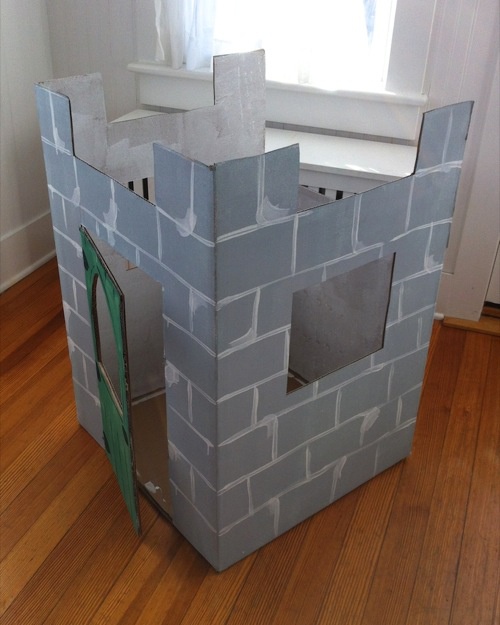
Let the paint dry thoroughly in a well-ventilated area. Then, you can add any decoration you like with whatever paint you have around the house. I raided the kids' tempera paint supplies, mixing colors as needed. (That greenish castle door was an ill-advised attempt to make brown. Should have looked it up, first.) Again, rollers are handy for large areas. Don't bother putting the paint on too thick. It's not a Hollywood set, after all.
And that is it. I would like to get some carpet squares to put in the boxes eventually. That is on the roadmap for vNext.
About the Open Top
Earlier I mentioned cutting the top off the box. We did not do this on our first attempt years ago, but here are a few reasons why I do so now:
-
Ventilation. An enclosed box, even with a few side windows, can get hot and stuffy inside. Plus, some boxes and paints outgas a bit, which can't be good for the kids. Top off equals cool, fresh air.
-
Easy access. The open top makes it much, much easier to retrieve toys and children as well as cleaning out any messes.
-
Safety. We can always see what's going on with the open top. And if a rambunctious child tips the box over — it happens more often than you would think — the open top allows you to get in or the child to crawl out easily. One enclosed box tipped over on the door will convince you of the wisdom here.
I have tried making A-frame roof structures over the top, leaving the gable ends open, but never figured out a method appropriate in effort to a disposable cardboard playhouse. The kids don't seem to care, so I haven't revisited the problem.
Reuse and Recycle
After our last two moves we ended up with, of course, a good selection of large moving boxes from which to build playhouses. The large wardrobe and appliance boxes are best. But not all boxes are created equal.
You don't want boxes that are too beaten up because they lose structural rigidity pretty quickly.
They also get dirty in transit, and it is not easy to wipe down a box to clean it up. Paint does help trap and hide dirt. Make sure to check the inside of the box for dirt, oils, smelly smells and bugs.
Boxes that have been soggy are poor choices. They are already starting to fall apart and I would not bother. I am also sensitive to mold and mildew, and most boxes that have been in storage for a few months will have picked up some fungus. Again, best to avoid these. You may, however, have better luck in a very dry climate.
For the set shown here we picked up new wardrobe boxes from a nearby big-box home improvement center for about $10 apiece.
Depending on your tolerance for chaos and falling-apart toys, as well as the mayhem created by your lovely children, these boxes will last anywhere from a few weeks to a few months. When the door breaks, cut it off. When a corner rips, tape it up. When the whole thing starts to warp, bend and fall apart, please recycle.
Then build a new one.